
Using Hotspots
In this Help Topic Hide
Hotspots are found on the images within an estimate. Hotspots is a search method for those users that prefer to find estimate items visually. Each Reference Image contains several Hotspots that represent the typical items that would be found in that particular type of room. By hovering over different locations of an image, different hotspot references can be found. To see an image and the hotspots that it contains, go to the Estimate tab in a project.
If the project is a new estimate and no groups have been created yet, an Add Group pop-up will automatically open when the Estimate tab is selected.
Type in a Name then select a Type from that dropdown list and a Dimension from that dropdown list and click OK. The new Name will now be displayed below the Estimate tab, and an image of the selected type will be displayed to the right of the tab.
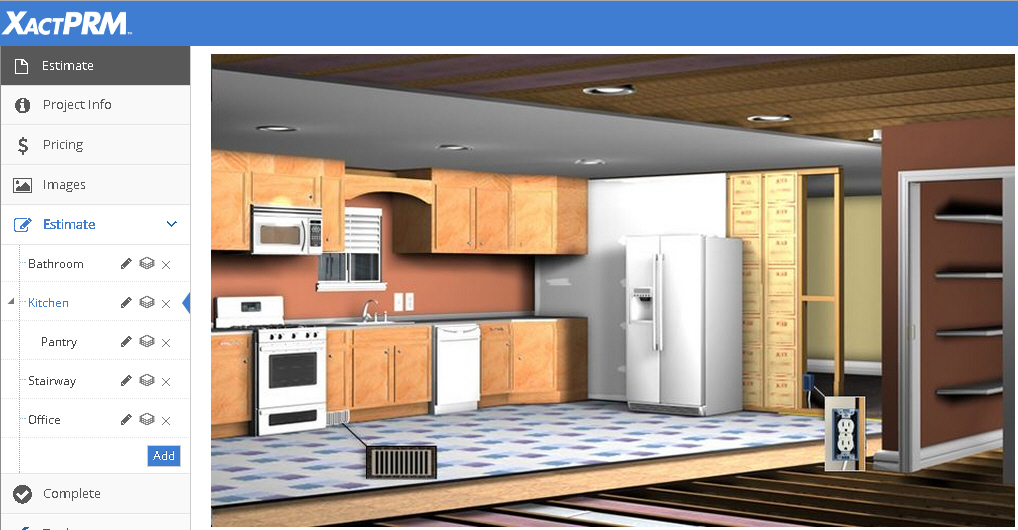
Hover over the image with your mouse cursor. As you move around the image the hotspots will be displayed as a tool tip next to your cursor. For example, in the above image, showing a living room, move your cursor over the floor area, and a too tip will appear with the text Floor Finishes. Now move your cursor over the door, and a tool tip will appear called Interior Doors.
Hover over the image with your mouse cursor and click on the area that represents the items you will be searching for.
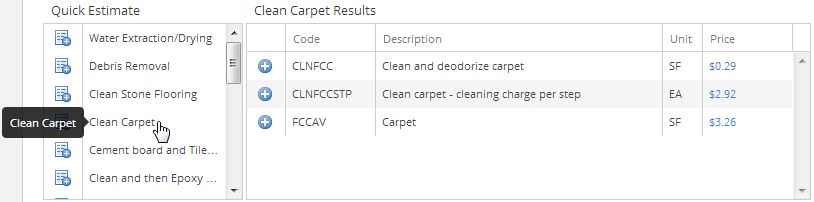
In the above image, the Floor Finishes hotspot was selected. By selecting a hotspot, two available searches become available: the Quick Estimate and the Floor Finishes Results. The Quick Estimate search now shows the quick estimate sets that pertain to Floor Finishes. The Floor Finishes Results, list the individual line items that are the most commonly used items in the floor area; the most common item being listed at the top. Note, as various items are added to projects the priority order in the Results field will be updated to represent which items have been select most by that particular user. Also, if a Home Quality filter has been set, the line items specific to the home quality selected, will be listed at the top of the list. In the above image, under the Floor Finishes Results, the FCCAV is shown in blue to indicate this line item is part of a My Pricing set that is assigned to this project. By selecting and adding that item, the My Pricing description and unit price will be added per the My Pricing setup and not the default pricing for the zip code where the project is located.
Hover over the name of a quick estimate and click on it.
The Results
grid now displays all of the line items that quick estimate contains.
If just one of the quick estimate line items wants to be added to the
estimate of this project, click on the  adjacent
to the line item. If all of the line items in the quick estimate list
want to be added, click on the add button next to the quick estimate name.
adjacent
to the line item. If all of the line items in the quick estimate list
want to be added, click on the add button next to the quick estimate name.
Whether one item is added or several items from the quick estimate were added, those added items are now listed in the Added Items area of the estimate located below the Quick Estimate and Results grids.

To edit a line item value, see “To edit an item in the Added Items section” in the Added Items help file.
For Technical Support please call 1-800-710-9228 or click here to access our live chat service.
Copyright 2004-2018 Xactware Solutions, Inc. All rights reserved.