
Managing Groups
In this Help Topic Hide
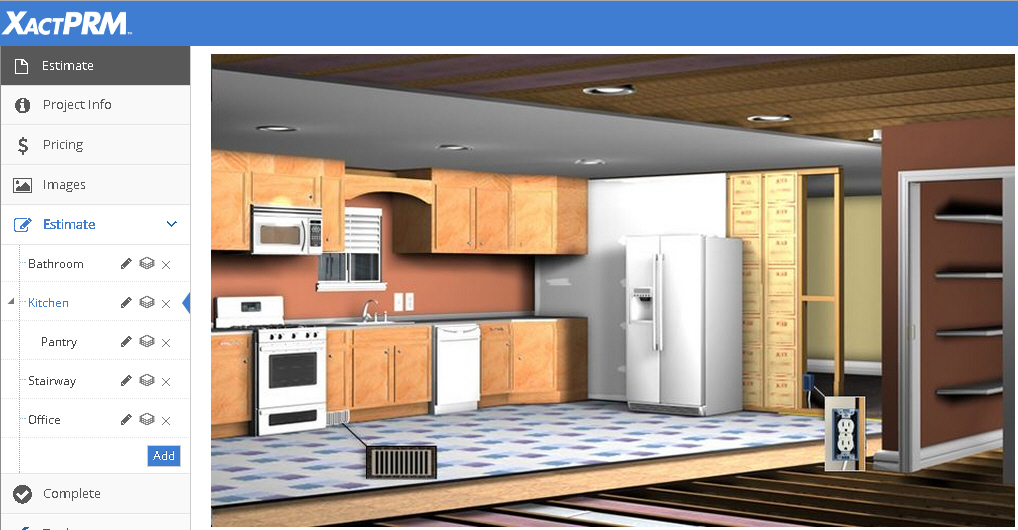
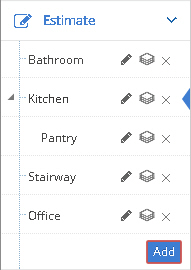
Groups represent areas or rooms in a property. For example: if a user has a Bathroom that has a few items that need to be repaired, by creating a group and calling it Bathroom and entering the size of that room, the user could enter items into that group and the calculations can be generated using the room dimensions, and all of those items will then be associated to that group. A project can have several groups associated with it. All estimate items entered in a group are then associated to that group name where they were entered. The groups can be found in the Estimate tab for any new or existing project.
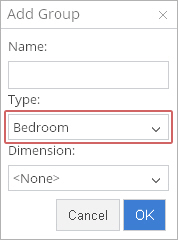
If the project is new and no groups have been created yet, by selecting on the Estimate tab, an Add Group pop-up will automatically open.

Type a Name in the designated field. As you begin to type a name, XactPRM will auto fill the field with the typical name that you are beginning to type. You can accept that auto fill or change it to what you would like. Then select a Type (see Group Type/Reference Images) and Dimension (see Group Dimension) from the dropdown menus and click OK. The Name of the new Group will now be displayed below the Estimate tab, and a Reference Image of the selected Type will be displayed in the section to the right. If the Type was set to <None>, no image will be displayed.
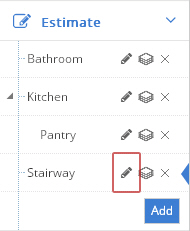
Click the edit icon next to the group or subgroup you want to edit.
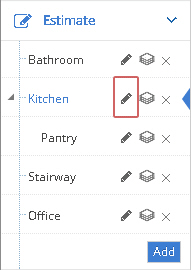
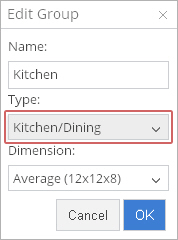
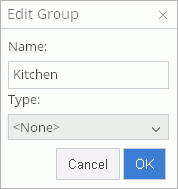
The Edit Group pop-up window will open. If the group you selected to edit is actually a subgroup, then the heading will read Edit Subgroup.
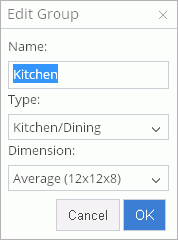
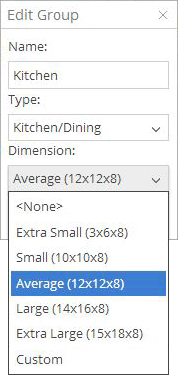
Changes to the Name, Type (see Group Type/Reference Images), and Dimension (see Group Dimension) can all be made. After changes are completed, select the OK button at the bottom of the group pop-up window, and the changes will be saved. If you've made changes to the Dimensions, any line items will be updated to reflect those changes.
To edit a subgroup, click on the edit icon adjacent to the subgroup and follow the same steps as above.
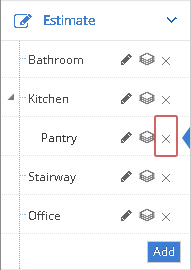
Click the delete icon that is adjacent to the group you would like to delete
A pop-up warning will open stating, “Are you sure you want to remove this group?” If you click the Cancel button, the pop-up message will close, and nothing will be deleted. If you click the OK button, the pop-up message will close, and the selected group will be removed from the dropdown list.
To delete a subgroup, click on the delete icon adjacent to the subgroup and follow the same steps as above.
*Be advised that all line items that have been added to that group will also be deleted. If a group is deleted that has subgroups, all of those subgroups will all be deleted and any line items that those subgroups contain will be removed as well
Click the Add button below the list of group names for that project.
The Add Group pop-up window will open.
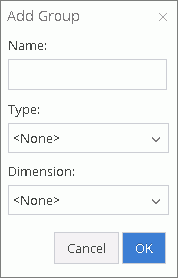
Type a Name in the designated field. As you begin to type a name, XactPRM will auto fill the field with the typical name that you are beginning to type. You can accept that auto fill or change it to what you would like. Once you have selected a group name then select a group Type (see Group Type/Reference Images) and a Dimension (see Group Dimension) and click OK. The Add Group pop-up will close and the new group will be added to the group list in alphabetical order.
To add a subgroup to a group, click on the  of the group you wish to add the subgroup to, then follow
the same steps as above.
of the group you wish to add the subgroup to, then follow
the same steps as above.
Just click on the group name you wish to select, and the group name will be highlighted and the associated image for that group will appear in the group image area. From here line items can then be added to that particular group by using the Search tools or the other item entry tools.
Reference Images allow the user to visually see various types of rooms to assist in determining the desired line items that need to be added to a room. The various image types are: Basement, Bathroom, Bedroom, Exterior, Floor, Framing, Garage, Kitchen/Dining, Living Room, Office, Pool, Preservation, Roof, Stairs and Other. The various Type images are shown as follows:
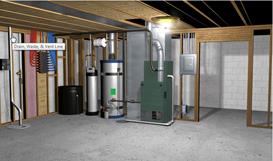
Basement
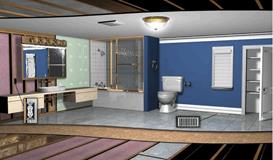
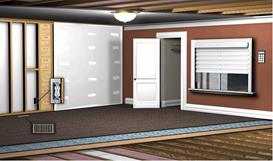
Bathroom
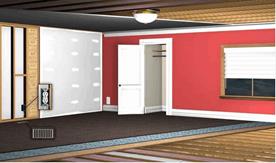
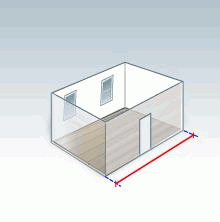
Bedroom

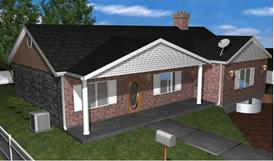
Exterior
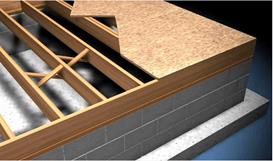
Floor
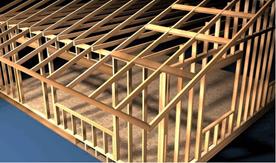
Framing
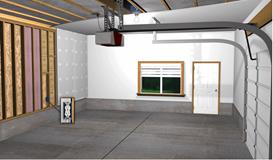
Garage
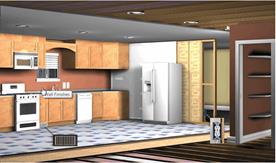
Kitchen/Dining
Living Room
Office
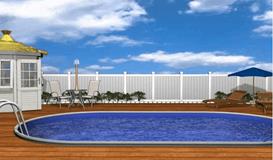
Pool
Preservation

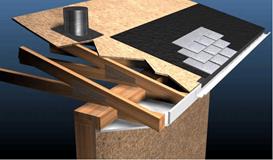
Roof
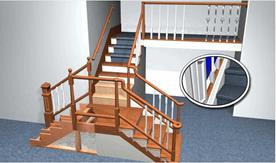
Stairs
Note: If Other is selected, no reference image is shown.
The reference image used is determined by the Type selected for that group.
Click the edit icon adjacent to the Name of the Group you wish to edit.
The Edit Group pop-up window will open
Choose the desired Type from the dropdown list
Then click the OK button.
Click the edit icon adjacent to the Name of the Group you wish remove the image from.
The Edit Group pop-up window will open
Open the dropdown Type list, and select the <None> option, and then click the OK button.
When the <None> option is selected, the reference image area collapses and the Search field, Quick Estimate, Item Results, and Added Items fields all move up to the top of the screen.
Each Group has the option to dimension to a predetermined size, to select custom dimensions, or for no dimension at all. The dimension can be selected at the time the Group is created or can be edited at any time after the group is created. Whether it is selected at the time of creation or to be edited later, the process is the same.
Click on the Dimension drop down and select None. This will allow you to create a group without a specific dimension. This selection can be useful for those groups that don’t require an actual dimensioned area to calculate line items to. For example, the Group type called Exterior or Preservation are both very useful for those PRM items that relate to the Exterior of a property. Reference Images are associated for both group types, but a size is not needed for landscaping, winterization, or pest control.
Note: Items that have Quantities that automatically adjust for room size will default to zero when None is selected.
By default XactPRM Online comes with several default dimensions that you can select when choosing a dimension for your group. Click on the dimension drop down and you should be able to select from Extra Small (3x6x8), Small (10x10x8), Average (12x12x8), Large (14x16x8), and Extra Large (15x18x8).
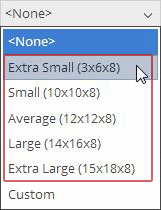
Next to each of these Dimension names is the room size, displayed in feet in Length x Width x Height format.
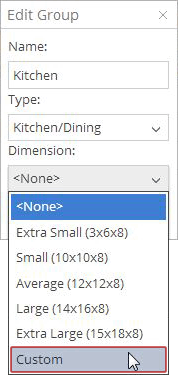
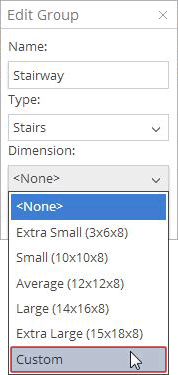
If you would like to create your own custom room dimension you can select Custom from the dimension drop down. (see Custom Groups)
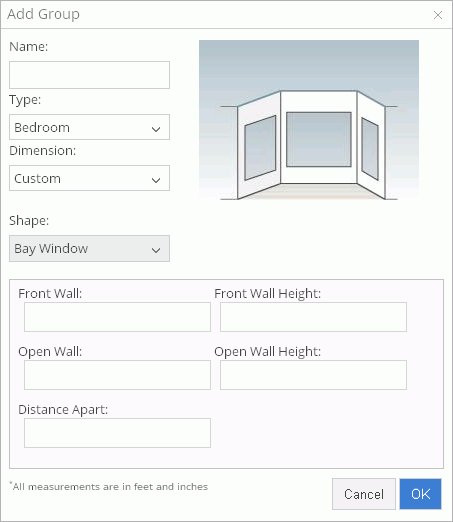
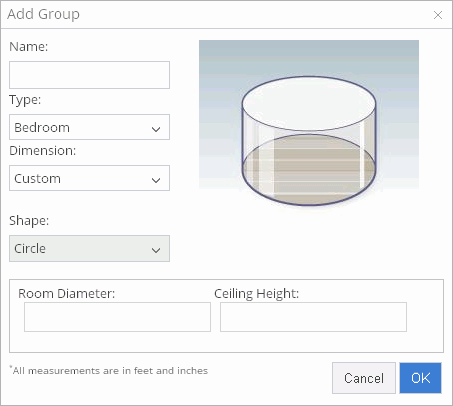
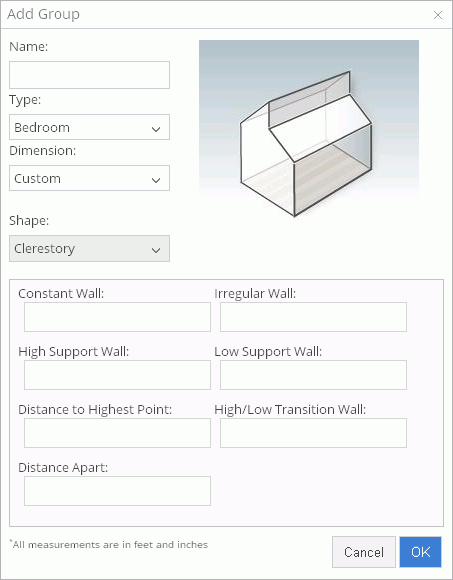
The Custom group area is where a user can create a group dimension that does not fit the 5 predetermined box dimensions of Extra Small, Small, Average, Large, or Extra Large. Box sizes of any dimension can be entered, as well as other shapes. The possible shapes that are available are: Bay Window, Box, Circle, Clerestory, Dormer, Elevation, Gable Roof & Box, Hip Roof & Box, Intersecting Cubes, Peaked, Sloped Ceiling, Stairway, Trapezoid, Tray, and Triangle. The Custom group option can be found along with the predetermined box dimensions, by going to the Estimate tab in a project
If the project is new and no groups have been created yet, when selecting on the Estimate tab, the Add Group pop-up will automatically open.
Type a Name in the designated field. Then select a Type from that dropdown list. Open the Dimension dropdown to display the list of predetermined box sizes as well as the Custom option.
Choose the Custom option and the Add Group pop-up window will expand to make available other dimension options.

The default Shape now showing, is a Box room. This allows you to enter the dimensions for a Box room that are different than the 5 predetermined dimensions of Extra Small through Extra Large. If you select the field under Room Length, you will notice that a red dimension appears to show a visual representation of what is the Room Length.
Enter a dimension in each of the three room dimension fields. As noted in the asterisk note next to the Cancel button, the dimensions are in feet and inches. So, 10' 3” would need to be entered as 1,0,',space,3,". If a dimension is just straight feet, you can type the feet integer only and XactPRM will add the feet tick marks. For fractions, enter the inch integer, then a space, then the fraction with a "/". So, 10' 2-1/2" would need to be typed in as 1,0,',space,2,space,1,/,2,". If it is a fraction only, without an inch integer, you would enter a "0", followed by a space, then the fraction or simply enter the fraction. So, 8' 1/2" could be entered as 8,',space,0,space,1,/,2," or it could be entered as 8,',space,1,/,2,". Either way, don't forget the tick marks to represent the inches.
After all dimensions are entered click the OK button. The new group Name will be saved and will now be shown as a separate tab under the Estimate tab. As each new group is added, they will be added in the order they were entered in the list of groups below the Estimate tab.
Click the Add button located under the Estimate tab.
When the Add Group pop-up opens, follow the above mentioned steps to add a custom dimension group. The different images for the available custom groups, are as follows: (Box is not included as it has already been shown)
Bay Window
Circle
Clerestory
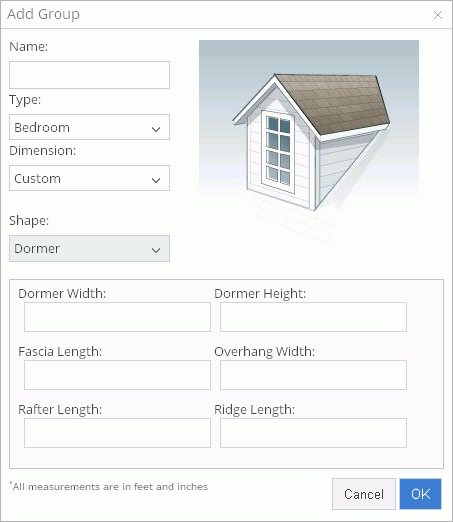
Dormer
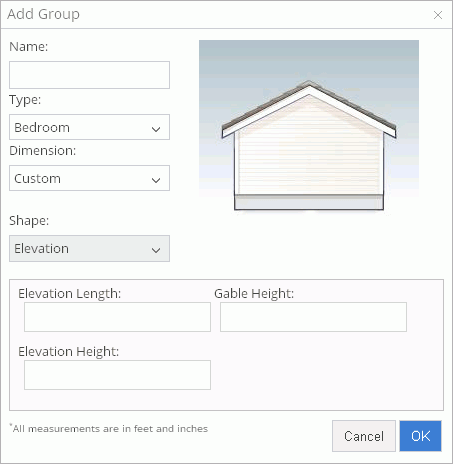
Elevation
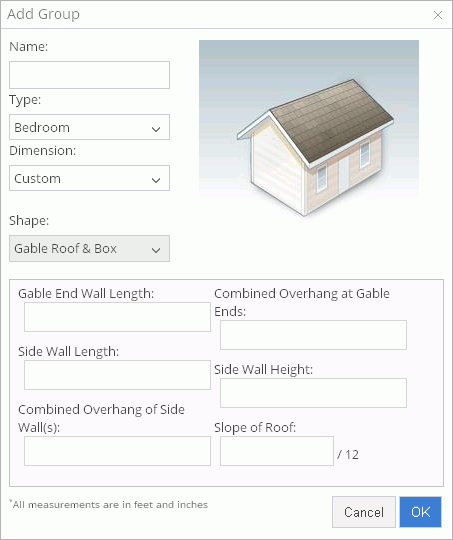
Gable Roof & Box
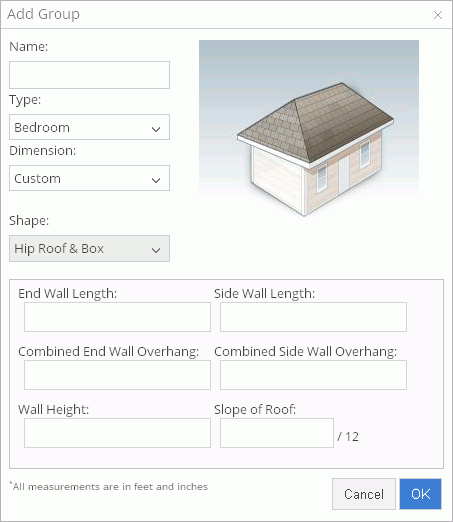
Hip Roof & Box
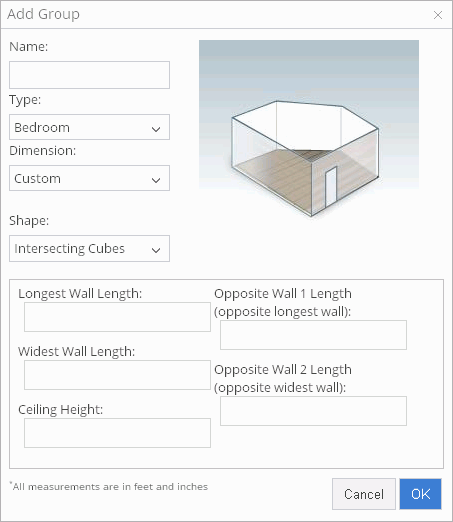
Intersecting Cubes
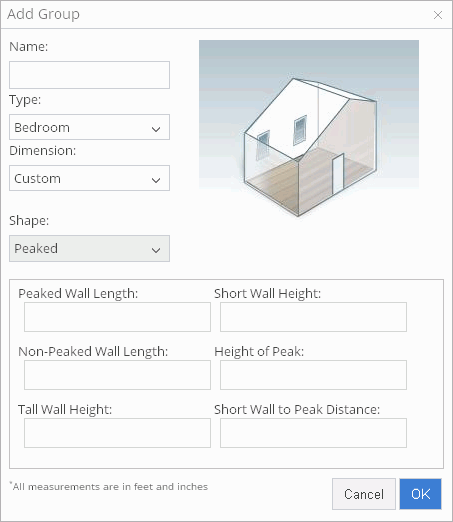
Peaked
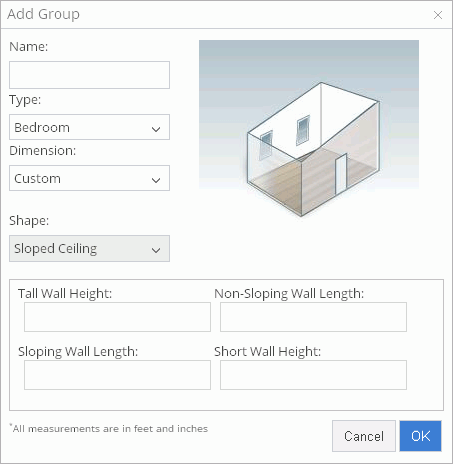
Sloped Ceiling
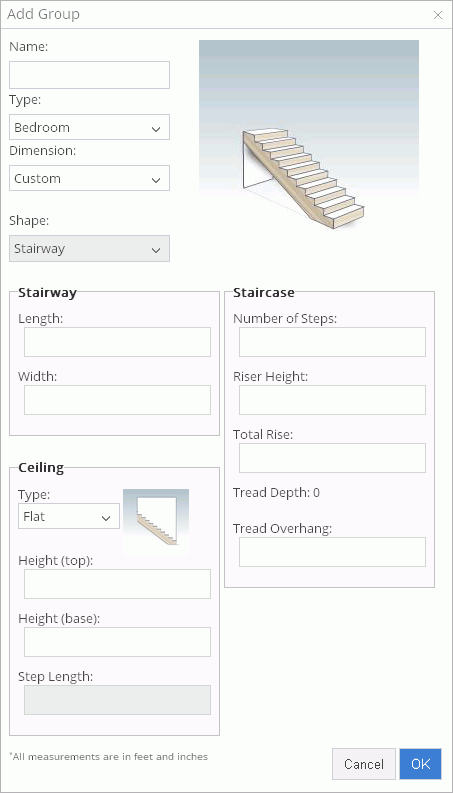
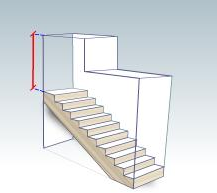
Stairway
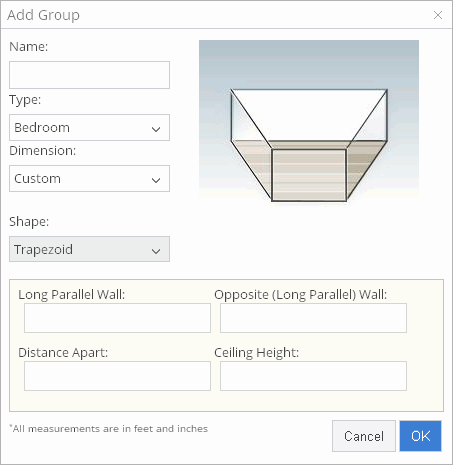
Trapezoid
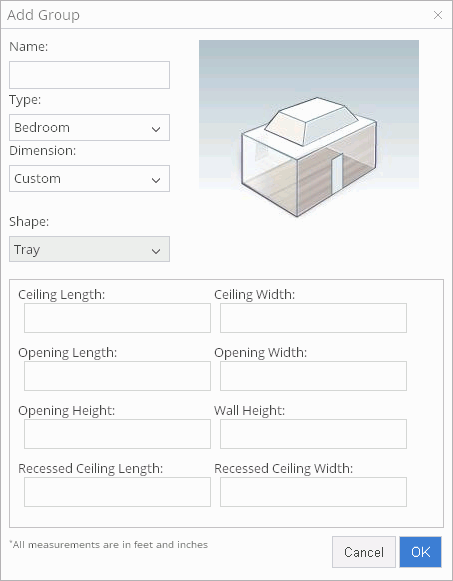
Tray
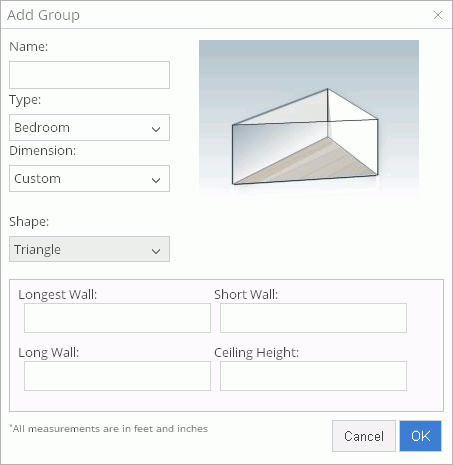
Triangle
Within the Stairway Custom Group Option, there are also different Ceiling Type options. This allows the user to view the different ceiling types associated with stairs, so that the correct ceiling type may be chosen for the project.
Create a new group, or select the edit icon next to the group you want to edit.
Change the Dimension to Custom.
An Edit Group popup will appear. Select the Stairway option from the Shape dropdown.

When Stairway is selected, the variables that are associated with a Stairway are now available. Under the section labeled Ceiling, open the dropdown to view the Types.
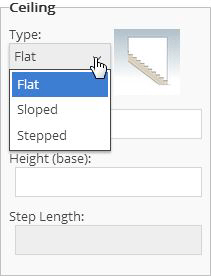
The three available ceiling types are: Flat, Slopped, and Stepped.
 Flat,
Flat,
 Sloped,
 Stepped.
Once the Ceiling Type is selected, the Ceiling Height, at the top and base of the stairs, can be entered. If Stepped is selected, the Step Length field will become available.
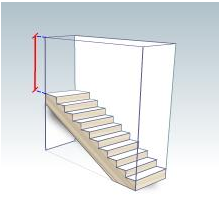
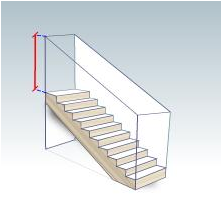
Note: to view what each variable represents, click in a variable field and a dimension will be shown in the image to indicated what the selected field represents.
For Technical Support please call 1-800-710-9228 or click here to access our live chat service.
Copyright 2004-2018 Xactware Solutions, Inc. All rights reserved.