Preferences – Users/Security
In this Help Topic Hide
To see a video help for this topic, click ![]() .
.
Users/Security is the area where a manager can add or remove users, set up organizational units, and set up security groups for the users. The Users/Security tab is located under the Preferences tab.
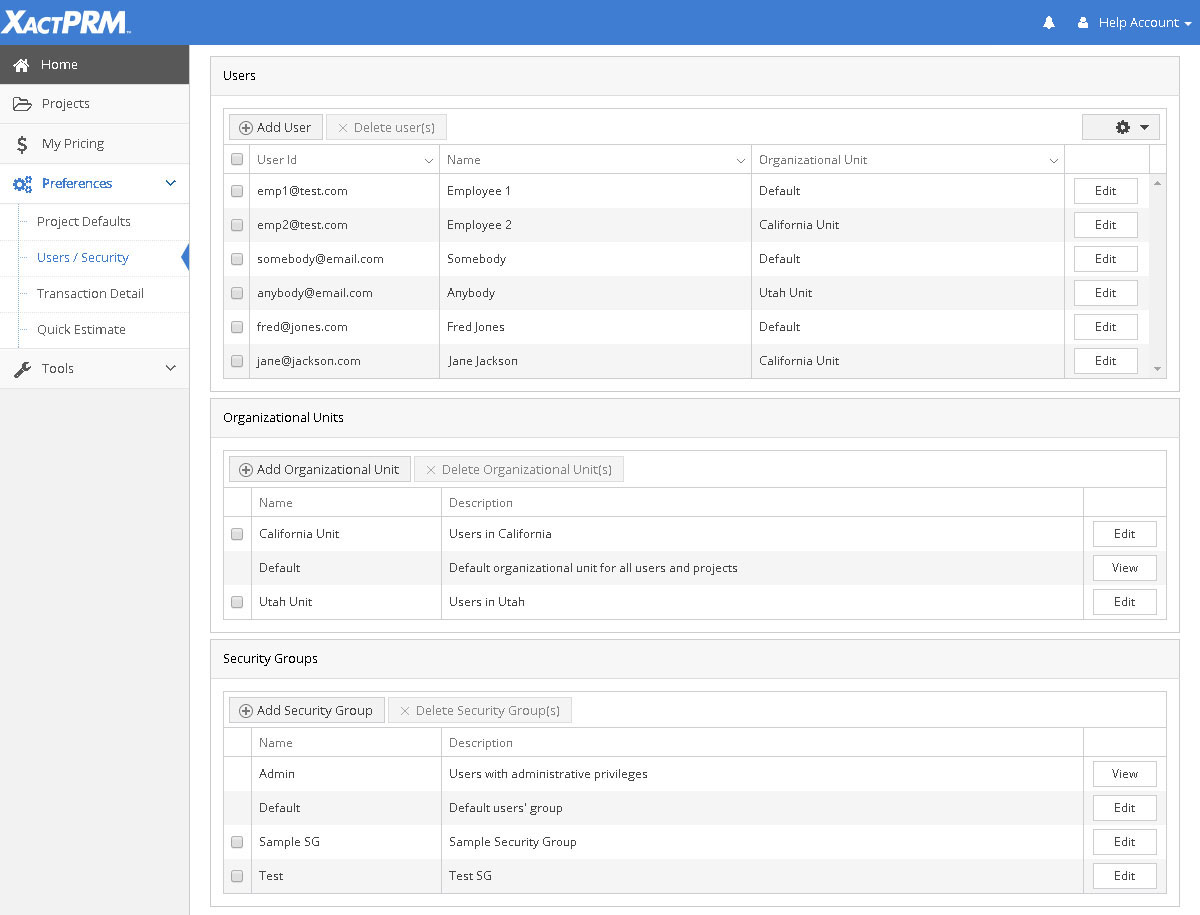
Only users that have administrative privileges will have access to make changes to this screen.
Click on the Add User button at the top of the screen and an Add New User pop-up window will open.
Enter the email address of the new user, select the Organizational Unit from the dropdown, and check the boxes of the Security Groups you wish the user to have access to. If you click on Cancel, the user will not be added. If you click on OK, the user and the assigned Organizational Unit and Security Groups will be saved. When the user is saved the email address will be added to the end of Users list. The User will then get an email that contains a link to the login page.
Click on the Edit button adjacent to the User you wish to edit, and an Update User pop-up will appear.

In this pop-up window you can change the Organizational Unit and the assigned Security Groups. After desired changes are completed, simply click OK or hit Enter on the keyboard. The user Name is shown here as reference only, and can't be changed.
Click on the option cog in the upper right corner and select Generate User Report.
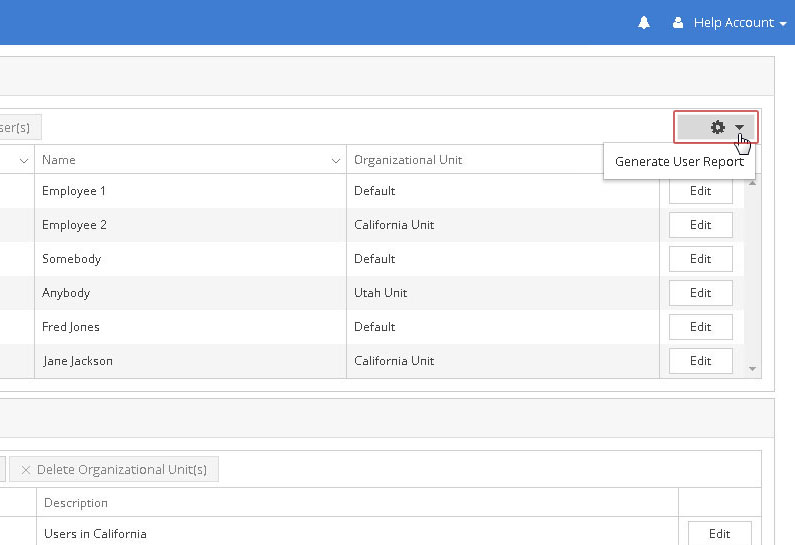
This will create an excel spreadsheet containing the information for all of the users for the instance that you are currently logged into. The information would include the First and Last Name, Email Address, Org Unit, Security Groups, and the Last Login date for each user in the instance.
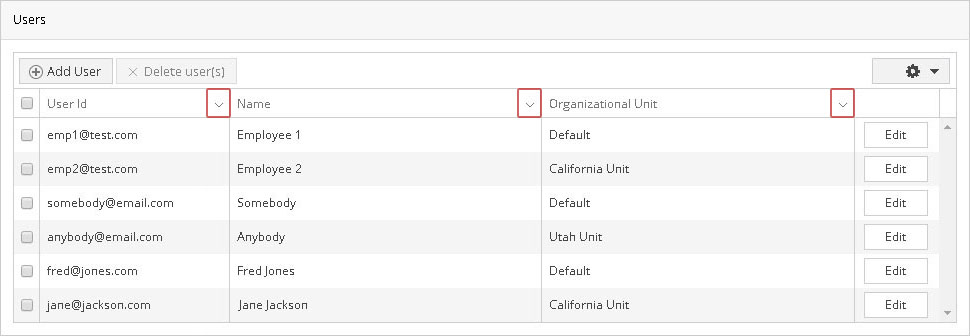
To help find a particular user, different filters can also be applied on the User Id, Name, and Organizational Unit columns. To add a filter, click on the down arrow on the right side of a column heading.
This will open a filter pop-up window.
Select the dropdown and click on the filtering criteria you would like to use, then type in the data that will be used for the criteria, and click on the Filter button. The column will then filter using the selected filter and a filter icon will be displayed in the column heading where a filter is applied.
To remove a filter, click on the filter dropdown arrow again and click on the Clear button. The filter in that column will be cleared and the filter icon at the column header will also be removed.
Click on the box adjacent to the user(s) you wish to remove and click on the Delete User(s) button at the top of the screen. A pop-up message will open on the screen.
If you click on Cancel, the user(s) will remain. If you click on OK, the user(s) will be removed.
Click on the Add Organizational Unit button in the Organizational Units section of the screen and an Add Organizational Unit pop-up window will open. The Organizational Unit section is an additional way for an administrator to separate different units of a company. For example, if you want your company to be broken up by regions of the country, you may want a West Coast division, and an East Coast division. Once you create those organizational units, then projects that are created by a user in the West Coast unit can only be viewed by users in the West Coast organizational unit. Those projects would then not be visible to users set up in the East Coast organizational unit. This helps to simplify the Project List by only showing the projects that have been created by users within a particular Organizational Unit.
Enter a Name and then a Description in the corresponding fields, and click OK.
Click on the Edit button adjacent to the Organizational Unit you wish to edit, and an Update Organizational Unit pop-up will appear.
In this pop-up window you can change the Description of the Organizational Unit, but not the Name. After desired changes are completed, simply click OK or hit Enter on the keyboard.
Click on the box adjacent to the organizational unit(s) you wish to remove and click on the Delete Organizational Unit(s) button. A pop-up message will open on the screen, asking to confirm that you indeed want to delete the selected organizational unit(s). If you click on Cancel, the organizational unit(s) will remain. If you click on OK, the organizational unit(s) will be removed. If an organizational unit is deleted, then a user assigned to that deleted unit will be automatically reassigned to the default organizational unit.
Click on the Add Security Group button in the Security Groups section of the screen and an Add Security Group pop-up window will open.
Give the new Security Group a Name and a Description. In the lower portion, check the box of those areas that you want this new user group to have access to, and if you want the group to have access to all Organizational Units or just the specific unit assigned to them. For example: If you wanted this security group to not have edit rights to the preferences or any of the pricing groups, but you want them to be able to create or add Estimators, Contacts, Headers, and Statements, then leave the Preferences and Pricing boxes unchecked, and click on each of the boxes under Project Info. The privileges for a security group can also be changed later, by coming back and editing the security group. (Note: If you want to set up the organizational units to only be visible by those in the same unit, a security group will need to be created where the View Projects in All Organizational Units is unchecked, and then that security group will need to be assigned to the users in each of the organizational units.)
Click on the Edit button adjacent to the security group you wish to edit and an Update Security Group pop-up window will open.
Here you can make any changes to the rights that are associated with this security group. After all changes are made, click OK or hit Enter on the keyboard.
* Be advised that the Admin security group is a read only group and can't be edited.
Click on the box adjacent to the group(s) you wish to remove and click on the Delete Security Group(s) button at the top of the Security Groups section. A pop-up message will open on the screen.

If you click on Cancel, the group(s) will remain. If you click on OK, the security group(s) will be removed.
For Technical Support please call 1-800-710-9228 or click here to access our live chat service.
Copyright 2004-2018 Xactware Solutions, Inc. All rights reserved.