Forms
In this Topic Hide
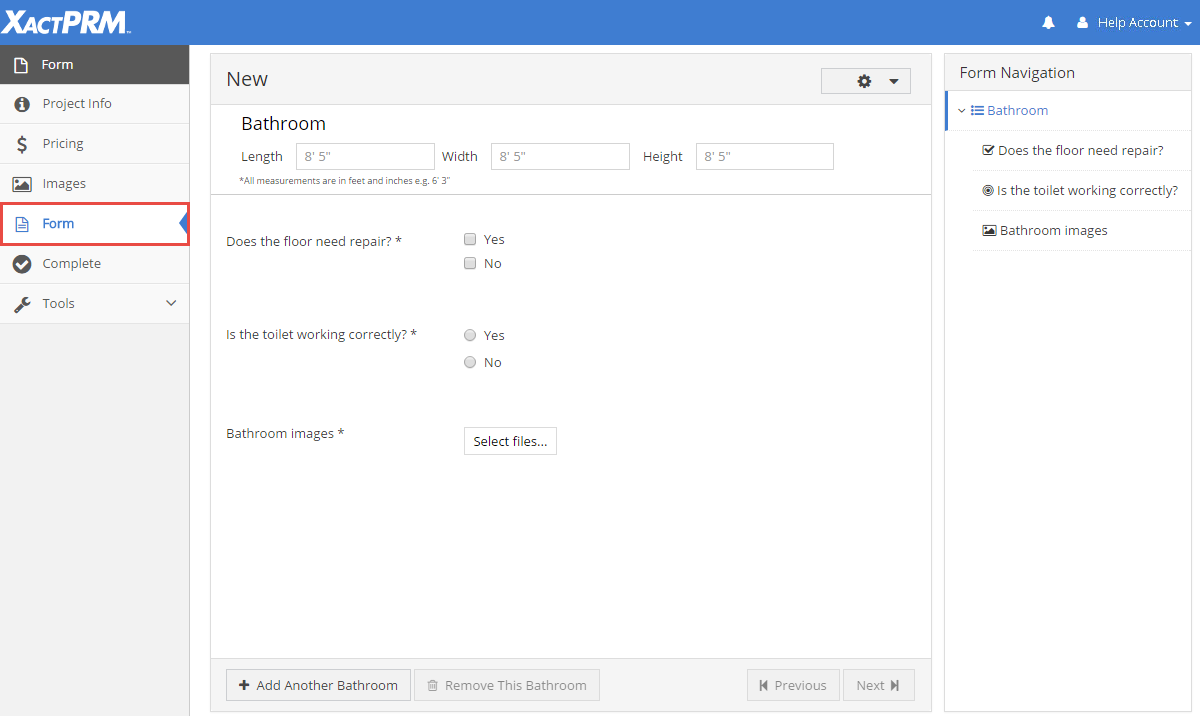
The Form tab is the area where a user opens to the selected form for a created project. Forms are actually created within the Form Builder section. When a project was created and the Form project type was selected, the Form tab becomes visible and the Estimate tab is not visible. The Form window can be accessed within the project screen from the Form tab.
The Form tab can be accessed from any of the Project Info, Pricing, Images, or Complete tabs inside the active project.
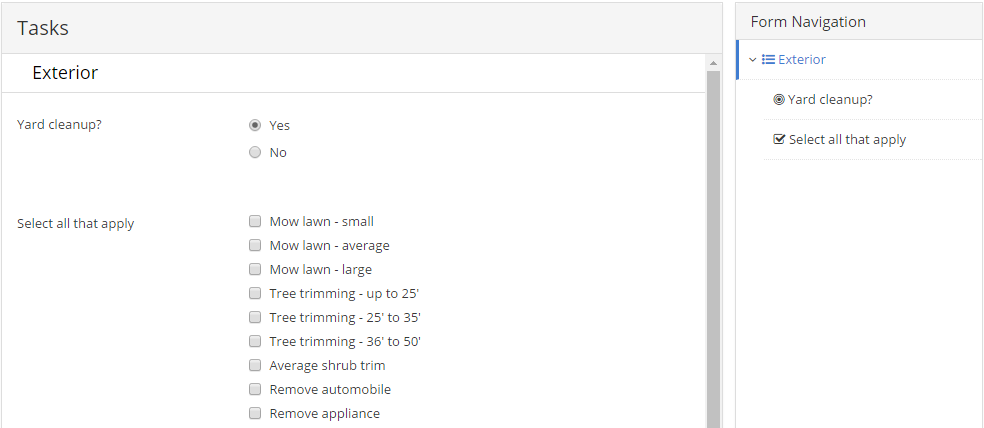
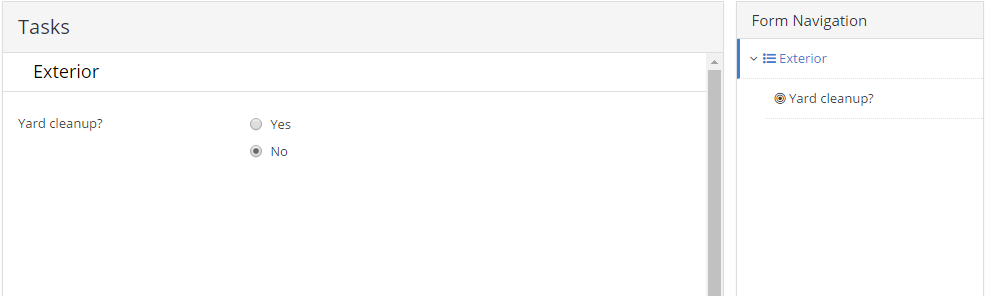
Forms are created by those that have access to the Form Builder feature within XactPRM, which makes for the possibility of many types of forms. Though each form may be different in layout and scope, user input will be needed and sometimes required within the forms. Some fields are conditional on the responses to other fields. For example, one field might be a simple yes or no question. If the answer to that question is yes, then another field is displayed, but if the answer is no, then a new field is not displayed.
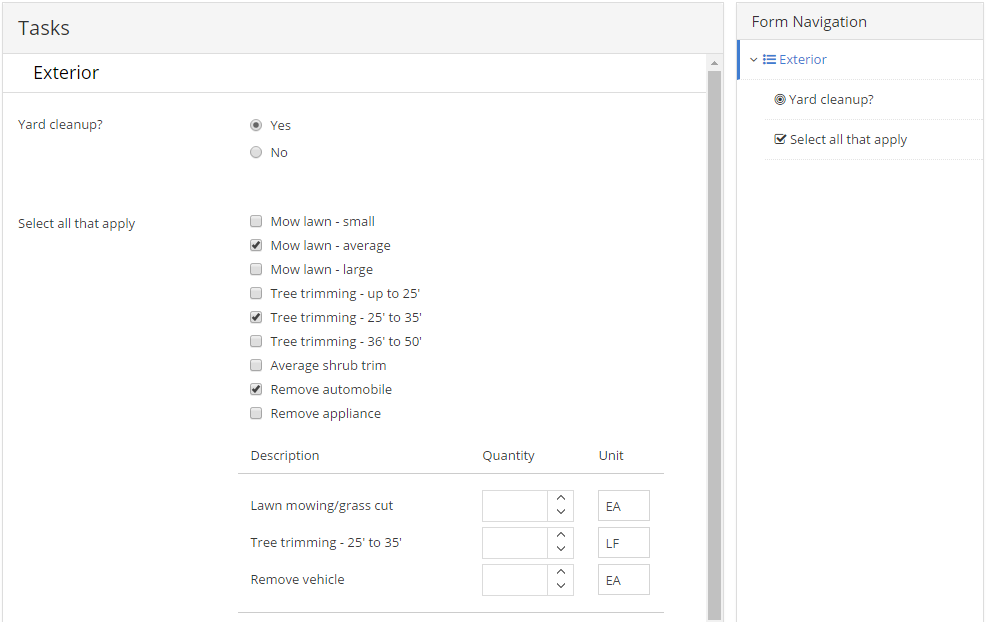
Some fields, when selected, will have line items displayed where the user will need to enter quantity of those line items. Those quantities can be entered by using the adjacent spinners or by clicking in the field and just typing the desired value.
Fields that are noted with an * are required fields specified by the form creator. Fields noted as required will need to have values entered or selected in order for the entire form to be completed. As information is entered in the various fields within a form, it will be automatically saved. The field type names may have been changed to something else, but the function of the fields remains the same. The different types of fields are explained below:
Attached Image: This allows the user to select image files from their computer to be displayed in the form. Click on the Select files box and you will be taken to the file management on your computer. Select the files that you wish to add to the form and click Open. The image files will be added to the form. If a large number of files is being added, there will be an Uploading spinner displayed.
Checkbox: This is a list type where the user can select more than one option from a list of checkbox options. Click inside the box in front of option to select that option. As options are selected, line items maybe opened requiring that you enter a quantity (see above).
Date: This allows the user to enter a date. Click on the calendar icon to select a date.
Dropdown List: This is a list type where the user can select one option from a dropdown list. Click on the dropdown arrow and the option list will be displayed. From the option list, select the desired option. As an option is selected, line items maybe opened requiring that you enter a quantity (see above).
Header: This is simply a marker within the form to help separate sections within the form. If dimension fields show in the header section, then those fields would need to be entered by the user. By entering values for the dimensions, then any line items under that header would use those dimensions to calculate the default quantities for the line items. If dimension fields are not showing, then no input is required.
Number: This requires the user to select a number input. You can click inside the number field and just type a number or click on the up/down arrows to increase or decrease by one.
Radio: This is a list type where the user can select only one option from a list of radio button options. Click on the radio button in front of the desired option. As an option is selected, line items maybe opened requiring that you enter a quantity (see above).
Text Block: This is simply text that is displayed on the form. No user entry is required.
Text Box: This is a text entry field. It can be a single line or multiple lines of text. By hitting the <Enter> key the user will be taken to a new line. All alphanumeric characters can be entered.
Sections are broken up by the Header in that section. A section starts with one header and ends before the next header. At the end of a particular section there may be a button called Add Another group (where group would be the name of the header in the form).
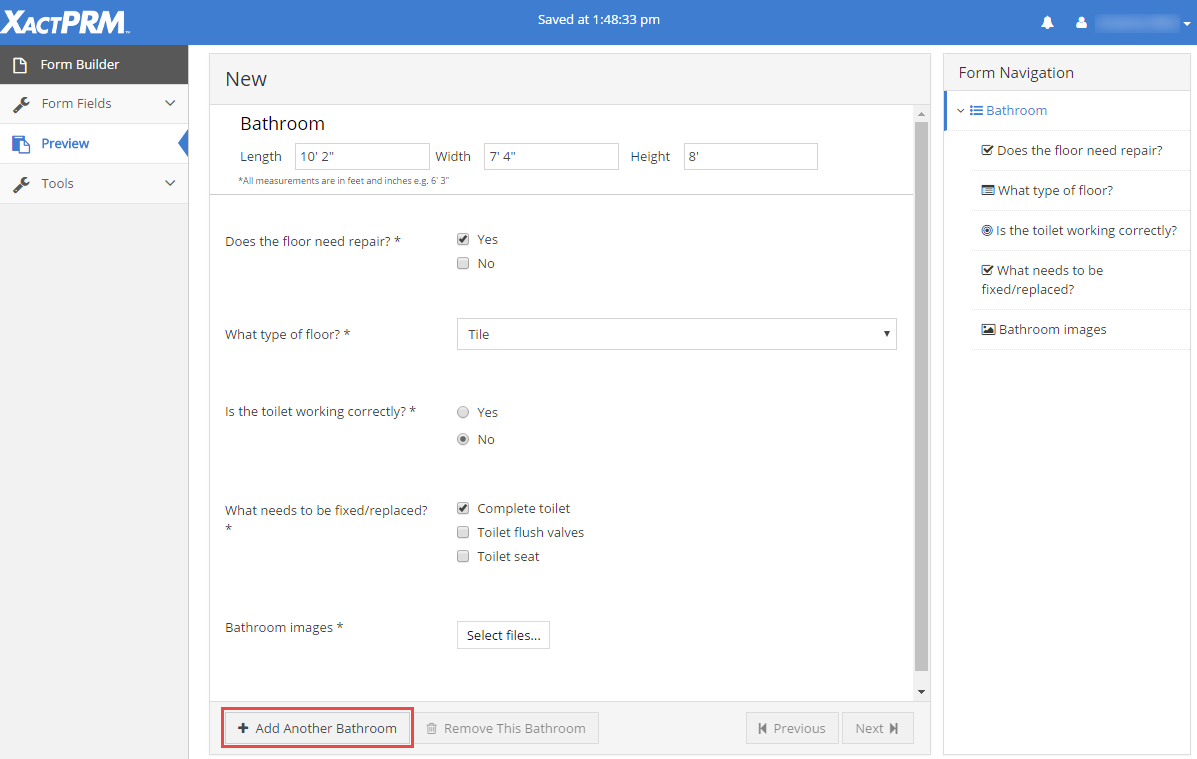
When that button exists, it means that the creator of the form has allowed the duplication of that section for the user. When you click on that button a new section will be added below the original section, and the header of the new section will be named the same as the original, with a 2 added to the first duplicate, a 3 for the next, and so on. All of the fields in a duplicate section will be in the same order in any duplicate sections that are added.
If you add a duplicate section and decide that you don't need it, there is a way to remove the duplicate. Click on the Remove This group button that appears next to the Add Another group button (where group would be the name of the header in the form). A confirmation prompt will appear to verify that you do indeed want to delete the section. When a section is deleted any duplicates are renumbered. Meaning, if you have the original and two duplicates and you remove the first duplicate, the second duplicate will be renumbered to replace the first. If you only have the original and one duplicate and you decide to delete the original, the duplicate now becomes the original. Only sections that have duplicates have the ability to be deleted.
When a form has all fields entered and changes are finished, the form can be marked as Complete. A form needs to be set to Complete before an assignment can be sent back to XactPRM Analytics. A form is marked as being In Progress when created, and therefore additions or corrections can be made. When a form is marked as Complete, fields are read only and no further changes can be made. The Complete option can be found on the menu bar from anywhere inside a form project.
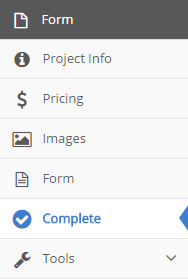
Click on the Complete tab.

If there are required items that have not been entered, those will show up in red, as shown in the image above. The Change Status button will also be greyed out, and the form can't be marked complete. To enter the required information, click on the fields indicated by the red text and arrow and you will be taken to that required field, where you can enter the information.
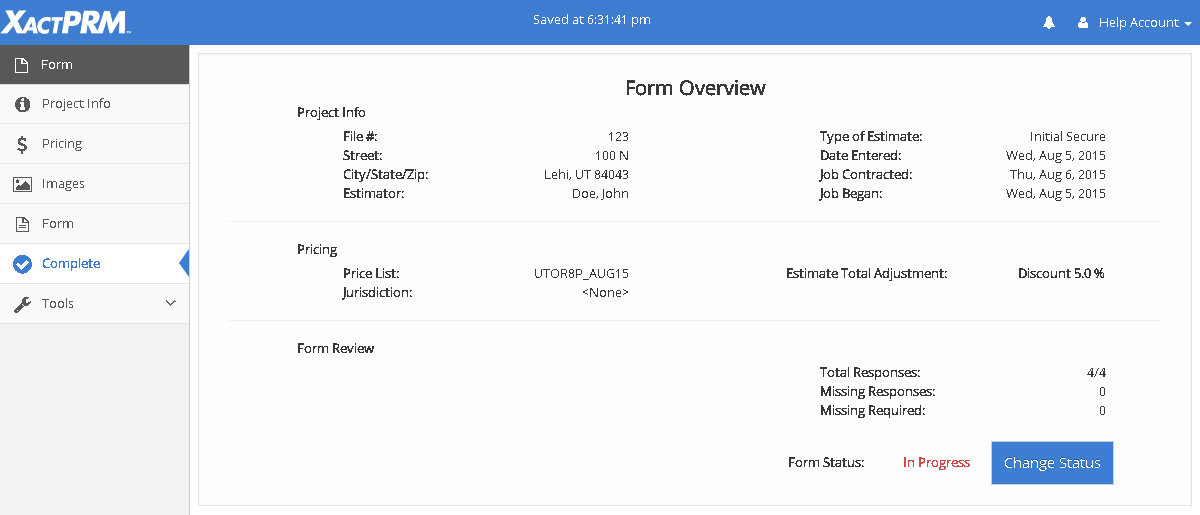
Once all required items are entered, click on the Complete tab again. The Form Overview window will open again and all previous red text should now be black and the Change Status button is no longer greyed out.
Click on the Change Status button and the Form Status will change to Complete.
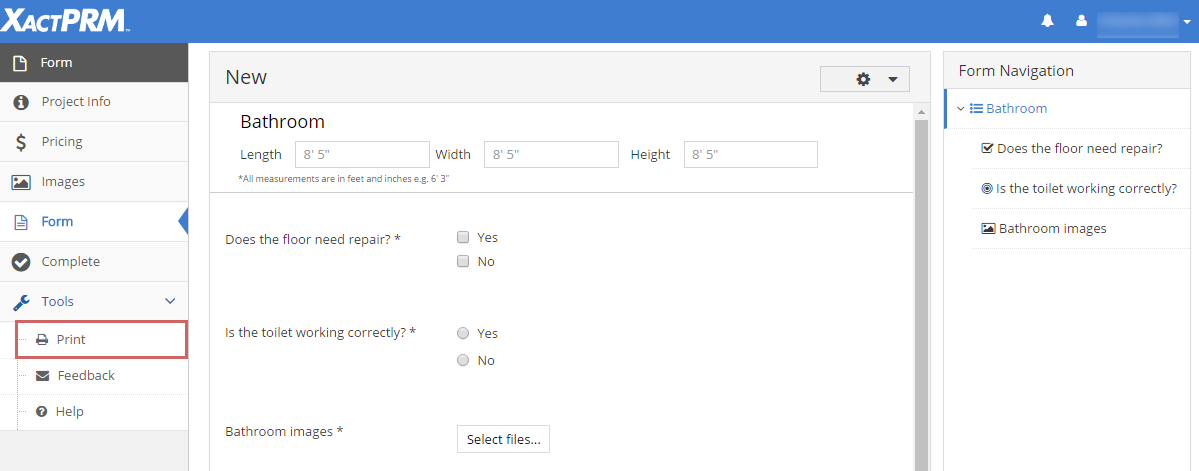
A form can be printed anytime during the process. A blank form can be created or the filled-out form can be printed when all information is entered or when partial information is filled in.
To print a blank form, click on the Tools option from within the Form window and then the Print option.
This will open a new pop-up Print Manager window.
Click on the dropdown arrow under Form, to select the form you wish to print.
![]()
There will be two options for the report that you are currently in. If you select the "... Blank" version, as shown above, there won't be any preview of the form, but you will instructed to "Click Print to View". Click on the blue Print button and you will be taken to your browser's print manager where you can see a preview of the blank form. Using your browser's print manager, you can send the form to your printer or save it as a PDF file to be viewed and printed later.
To print a partially completed form or a completed form, click on the same Tools option from within the Form window and then the Print option.
This time when the pop-up Print Manager window opens, select the file format you wish to save the form in, from the Format dropdown list.
Click on the dropdown arrow under Form, to select the form you wish to print. There will be the same two options for the report that you are currently in. If you select the form name, without the blank, there will be a preview of the form showing to the right.
If there is a company header, statements, and images in the form, those options will automatically be selected, but you can uncheck those options if you wish. The preview to the right will show you the form according to the options you've selected. Click on the Save button and your form will be saved according to the preview that was shown.
Once a form has been completed, an estimate can be created from that form. With the Checkbox, Dropdown List, and Radio fields, line items can be added to a form as the form is completed by the user. Once all of a form is completed and all optional line items are added, an XactPRM estimate can be created from the data that is in the form.
From within the form that you want to create the estimate from, in the upper right corner, click on the options cog and then Generate Estimate. Note: If the Generate Estimate option is not there, the profile owner has locked down that option.

A new Generate Estimate pop-up will now open.
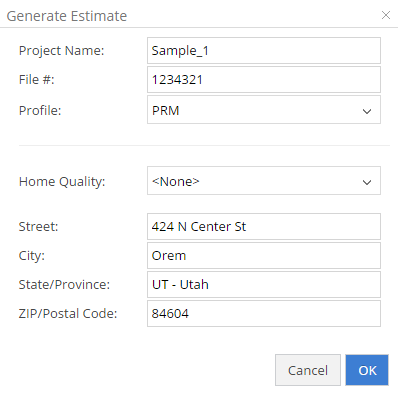
All of the fields will be automatically populated with the same information that was used from the form creation. The Project Name will be populated with the same name as the form, with the "_1" extension added to it. Change any of the fields or just accept it as it is by clicking on the OK button. When the OK button is pushed a new confirmation pop-up will open asking you to confirm that you acknowledge there will be a charge for the creation of an estimate.
If you click Cancel, the pop-up will close and you will be taken back to the Generate Estimate pop-up. If you click OK, the estimate will be created. When the estimate generation is completed a new confirmation pop-up will open.
Click on the Open Estimate button and the newly created estimate will open to the Property Information window. From here you can navigate around in the same way you would with any other estimate created in PRM. Any line items from the form can be seen in the Estimate tab, and any added images can be seen in the Images tab.
For Technical Support please call 1-800-710-9228 or click here to access our live chat service.
Copyright 2004-2018 Xactware Solutions, Inc. All rights reserved.